ESP32-S3: The Versatile Powerhouse for Your Next Embedded Project
Explore the ESP32-S3, a feature-rich microcontroller SoC from Espressif, designed for advanced IoT applications with enhanced performance and connectivity.
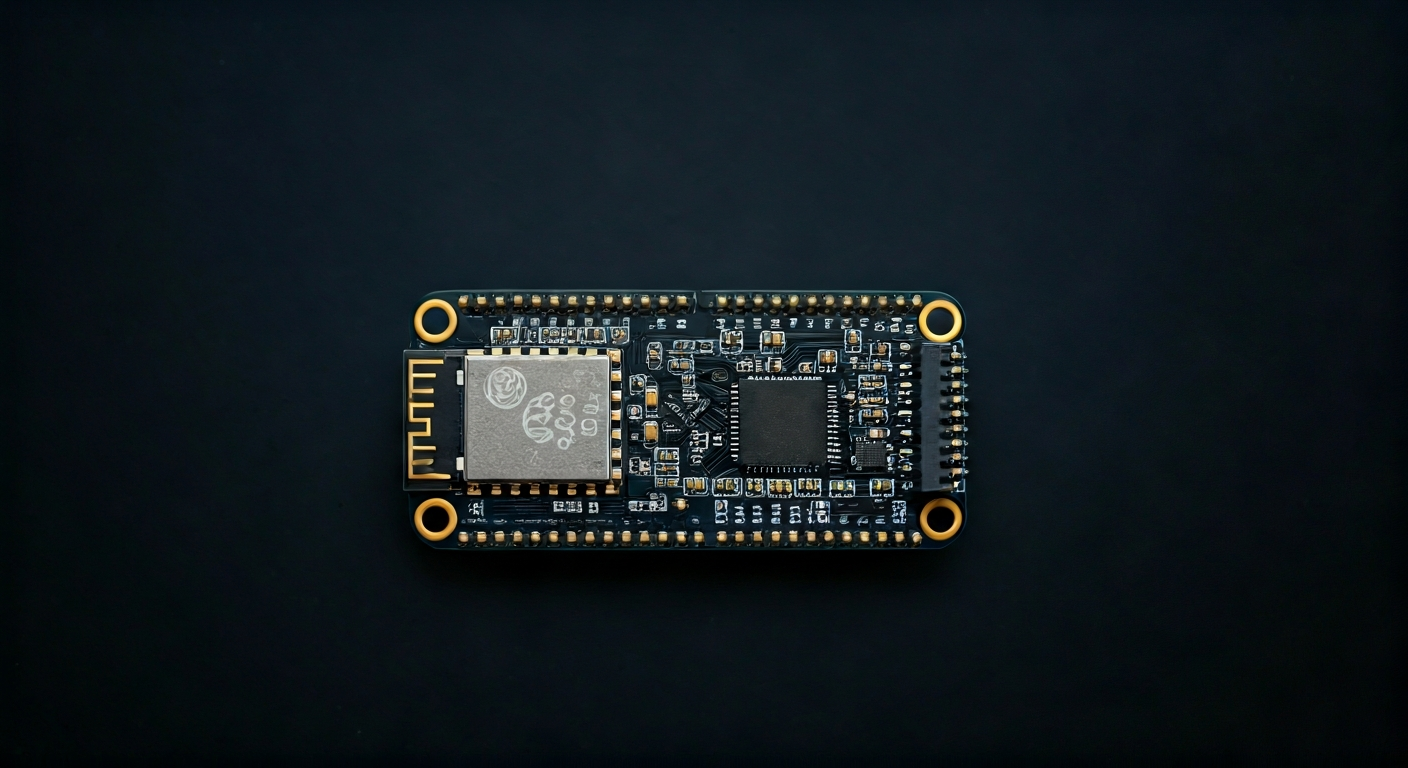
The ESP32-S3 is a significant evolution in Espressif's popular ESP32 family of microcontrollers. Building upon the success of its predecessors, the ESP32-S3 integrates a dual-core Xtensa LX7 processor, offering substantially improved performance and a wider range of peripherals. This makes it an ideal choice for complex embedded projects that require more processing power, faster execution, and robust connectivity options. Its design focuses on delivering a balance of performance, power efficiency, and cost-effectiveness, catering to a broad spectrum of users from hobbyists and students to professional embedded engineers.
At the heart of the ESP32-S3 is its dual-core 32-bit LX7 microprocessor, capable of running at clock speeds up to 240 MHz. This architecture provides significant computational power, allowing for more demanding tasks such as running machine learning models at the edge, advanced signal processing, and complex graphical user interfaces. The SoC also features a dedicated hardware accelerator for vector instructions, further boosting its performance in specific computational workloads. This makes it a compelling option for applications that were previously out of reach for many microcontrollers.
Compared to earlier ESP32 variants, the ESP32-S3 introduces several key enhancements. It boasts a larger number of GPIO pins, improved USB capabilities with native USB OTG support, and support for a wider array of peripherals including a parallel I/O interface (PIO) for high-speed data transfer. It also includes an integrated security engine for robust encryption and secure boot features. This makes the ESP32-S3 particularly well-suited for applications requiring enhanced security, faster data handling, and more flexible I/O configurations, positioning it as a go-to chip for modern IoT devices and embedded systems.
The ESP32-S3 is designed for makers, students, and engineers who need a powerful, connected, and versatile microcontroller. Its extensive peripheral set, combined with its strong processing capabilities and built-in Wi-Fi and Bluetooth, makes it suitable for a wide range of projects. From smart home devices and industrial automation to robotics and interactive art installations, the ESP32-S3 provides the foundation for ambitious and innovative embedded solutions. Its growing ecosystem and support in popular development environments further lower the barrier to entry for complex projects.
Watch
Related video, embedded from YouTube.
Specifications
| Microcontroller / SoC | ESP32-S3 |
| Architecture | Dual-core 32-bit Xtensa LX7 microprocessor |
| Clock speed | Up to 240 MHz |
| Flash / Storage | Typically 4MB to 16MB external SPI flash (on development boards) |
| RAM / SRAM | 320KB SRAM (internal) + 16MB external PSRAM (optional, on some boards) |
| Operating voltage | 3.3V |
| Digital I/O pins | Up to 45 (depending on board implementation) |
| Analog / ADC | 14-bit ADC (up to 20 channels) |
| PWM | Up to 16 channels |
| Connectivity | Wi-Fi 802.11 b/g/n (2.4 GHz), Bluetooth 5 (LE) |
| USB | Native USB OTG (Full Speed) |
| Power input | USB (5V), VIN pin (3.3V-5V recommended), Li-Po battery connector (on some boards) |
| Dimensions | Varies by development board (e.g., typical dev board ~50mm x 25mm) |
Pinout & pin functions
| Pin | Function |
|---|---|
| 3V3 | 3.3V Power Output |
| GND | Ground |
| EN | Chip Enable / Reset |
| GPIO0 | Boot Mode Select / General Purpose I/O |
| GPIO1 (TX0) | UART0 Transmit / General Purpose I/O |
| GPIO2 (RX0) | UART0 Receive / General Purpose I/O |
| GPIO3 (TX1) | UART1 Transmit / General Purpose I/O |
| GPIO4 (RX1) | UART1 Receive / General Purpose I/O |
| GPIO5 | General Purpose I/O |
| GPIO6 | General Purpose I/O (often connected to SPI Flash) |
| GPIO7 | General Purpose I/O (often connected to SPI Flash) |
| GPIO8 | General Purpose I/O (often connected to SPI Flash) |
| GPIO9 | General Purpose I/O (often connected to SPI Flash) |
| GPIO10 | General Purpose I/O (often connected to SPI Flash) |
| GPIO11 | General Purpose I/O (often connected to SPI Flash) |
| GPIO12 | General Purpose I/O |
| GPIO13 | General Purpose I/O |
| GPIO14 | General Purpose I/O |
| GPIO15 | General Purpose I/O |
| GPIO16 | General Purpose I/O |
| GPIO17 | General Purpose I/O |
| GPIO18 | General Purpose I/O |
| GPIO19 | General Purpose I/O |
| GPIO20 | General Purpose I/O |
| GPIO21 | General Purpose I/O |
| GPIO33 | General Purpose I/O |
| GPIO34 | General Purpose I/O (ADC1_CH6) |
| GPIO35 | General Purpose I/O (ADC1_CH7) |
| GPIO36 | General Purpose I/O (ADC1_CH8) |
| GPIO37 | General Purpose I/O (ADC1_CH9) |
| GPIO38 | General Purpose I/O (ADC1_CH10) |
| GPIO39 | General Purpose I/O (ADC1_CH11) |
| GPIO40 | General Purpose I/O |
| GPIO41 | General Purpose I/O |
| GPIO42 | General Purpose I/O |
| GPIO43 | General Purpose I/O |
| GPIO44 | General Purpose I/O |
| GPIO45 | General Purpose I/O |
| GPIO46 | General Purpose I/O |
| GPIO47 | General Purpose I/O |
| GPIO48 | General Purpose I/O |
| GPIO18 | General Purpose I/O (PWM0_CH0) |
| GPIO19 | General Purpose I/O (PWM0_CH1) |
| GPIO20 | General Purpose I/O (PWM0_CH2) |
| GPIO21 | General Purpose I/O (PWM0_CH3) |
| GPIO22 | General Purpose I/O (PWM1_CH0) |
| GPIO23 | General Purpose I/O (PWM1_CH1) |
| GPIO24 | General Purpose I/O (PWM1_CH2) |
| GPIO25 | General Purpose I/O (PWM1_CH3) |
| GPIO26 | General Purpose I/O (PWM2_CH0) |
| GPIO27 | General Purpose I/O (PWM2_CH1) |
| GPIO28 | General Purpose I/O (PWM2_CH2) |
| GPIO29 | General Purpose I/O (PWM2_CH3) |
| GPIO30 | General Purpose I/O (PWM3_CH0) |
| GPIO31 | General Purpose I/O (PWM3_CH1) |
| GPIO32 | General Purpose I/O (PWM3_CH2) |
| GPIO33 | General Purpose I/O (PWM3_CH3) |
| GPIO34 | General Purpose I/O (ADC1_CH6) |
| GPIO35 | General Purpose I/O (ADC1_CH7) |
| GPIO36 | General Purpose I/O (ADC1_CH8) |
| GPIO37 | General Purpose I/O (ADC1_CH9) |
| GPIO38 | General Purpose I/O (ADC1_CH10) |
| GPIO39 | General Purpose I/O (ADC1_CH11) |
| VP | ADC Positive Input |
| VN | ADC Negative Input |
| GND | Ground |
| 3V3 | 3.3V Power Output |
| USB_DP | USB Data Positive |
| USB_DM | USB Data Negative |
Wiring & circuit basics
Powering the ESP32-S3 development board is straightforward. Most boards feature a USB-C port, which can supply 5V and sufficient current (typically 500mA) for most projects. Alternatively, a VIN pin is often available, which can accept a voltage between 3.3V and 5V; ensure your power supply can provide at least 500mA, and preferably 1A or more for projects with high current draw (like external sensors or motors). Some boards also include a connector for a single-cell Li-Po battery, which requires a dedicated charging circuit. Always connect the power supply to the USB port or VIN pin; never attempt to power the board through the 3.3V pin, as this bypasses the onboard voltage regulator.
The ESP32-S3 operates at a logic level of 3.3V. This means that its GPIO pins output and accept signals within the 0V to 3.3V range. Connecting a 5V device directly to an ESP32-S3 GPIO pin can damage the microcontroller. If you need to interface with 5V logic devices, you must use a logic level shifter. Conversely, if you are connecting a 3.3V device to a 5V microcontroller (like an Arduino Uno), you typically need a level shifter to boost the voltage. When wiring simple components like LEDs, always connect them in series with a current-limiting resistor (typically 220-330 ohms for standard LEDs) to protect both the LED and the ESP32-S3 GPIO pin.
For example, to blink an LED, connect the anode (longer leg) of the LED to a digital GPIO pin (e.g., GPIO2). Connect the cathode (shorter leg) of the LED to one end of a resistor (e.g., 330 ohms). Connect the other end of the resistor to a GND pin. When the GPIO pin is set to HIGH (3.3V), current flows through the resistor and LED to ground, lighting it up. When set to LOW (0V), the LED turns off. For I2C communication with a sensor like a BME280, connect the sensor's SDA pin to GPIO21 (default I2C SDA) and its SCL pin to GPIO22 (default I2C SCL). Connect the sensor's VCC to the ESP32-S3's 3V3 pin and its GND to a GND pin.
Programming & getting started
The ESP32-S3 is highly versatile in its programming environments. The most common approach for makers and students is using the Arduino IDE. You'll need to install the ESP32 Arduino Core via the Board Manager. This allows you to write C++ code using the familiar Arduino API. For Python enthusiasts, MicroPython and CircuitPython offer excellent support, enabling you to program the ESP32-S3 using Python. Professional embedded development is often done using Espressif's own ESP-IDF (Espressif IoT Development Framework), which provides a comprehensive C/C++ SDK and RTOS. PlatformIO, an integrated development environment for embedded systems, also offers robust support for the ESP32-S3 across various IDEs like VS Code.
To upload your first program (e.g., a 'Blink' sketch) using the Arduino IDE: 1. Install the ESP32 Arduino Core. 2. Connect your ESP32-S3 board to your computer via USB. 3. Select the correct board (e.g., 'ESP32-S3 Dev Module') and COM port from the Tools menu. 4. Copy and paste the 'Blink' sketch into the IDE. 5. Click the Upload button. The IDE will compile the code and flash it to the ESP32-S3. You may need to press the BOOT button on your board during the initial upload or if the upload fails, depending on the board's design and the IDE's configuration.