Raspberry Pi 2 Model B: The Quad-Core Powerhouse for Makers
A significant upgrade in the Raspberry Pi family, the Model B brought quad-core processing and increased RAM, making it a versatile choice for more demanding projects.
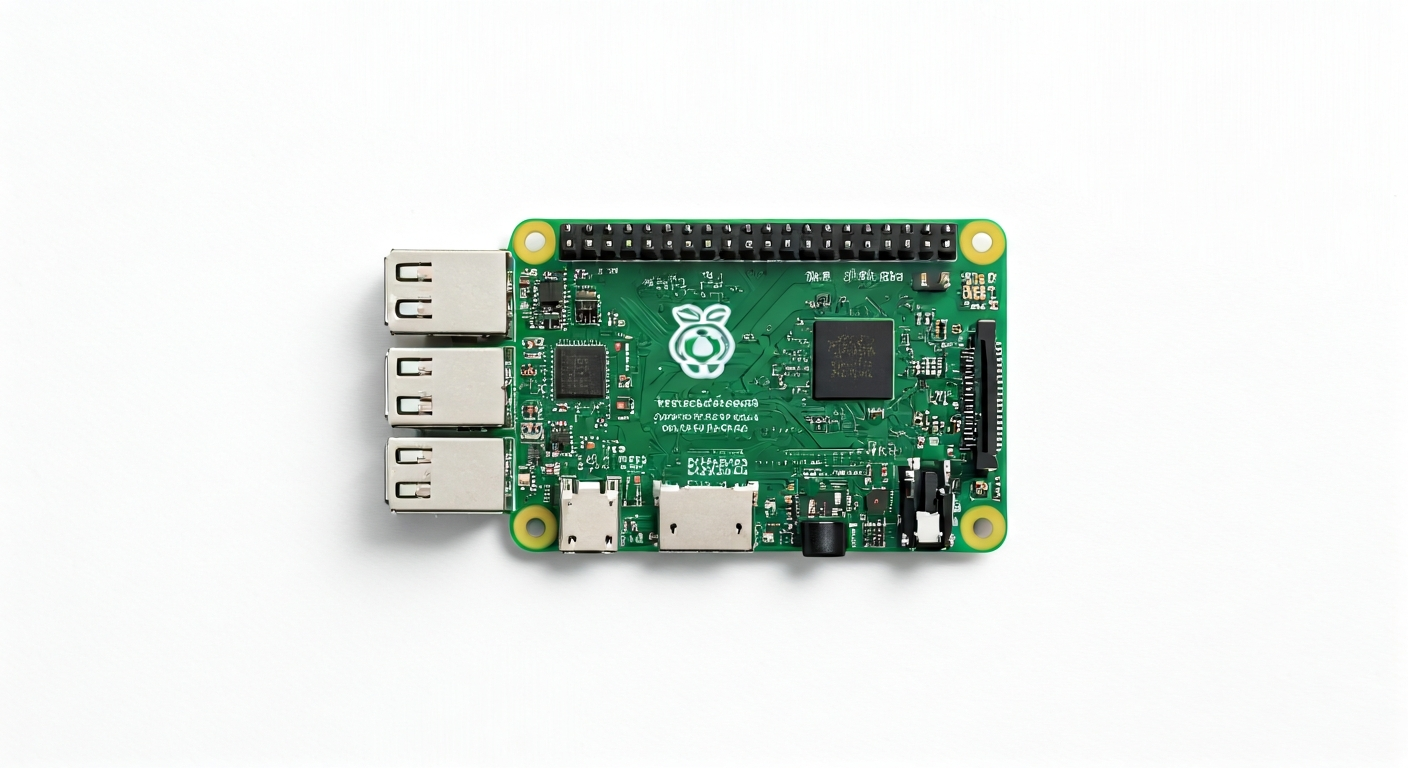
The Raspberry Pi 2 Model B, released in February 2015, represented a substantial leap forward in performance for the popular single-board computer. It was designed to bridge the gap between the earlier single and dual-core models and the more advanced, but often more expensive, single-board computers available at the time. This board aimed to make powerful computing accessible for education, hobbyist projects, and even some light industrial applications.
At the heart of the Raspberry Pi 2 Model B is the Broadcom BCM2836 SoC (System on Chip). This was a significant upgrade from its predecessors, featuring a quad-core ARM Cortex-A7 processor. This architecture provided a noticeable boost in processing power, allowing for smoother multitasking, more complex calculations, and better performance in graphically intensive applications compared to the single-core Pi 1. The increased processing capability made it suitable for projects that previously required a more powerful, dedicated computer.
Positioned as an evolution of the Raspberry Pi 1 Model B+, the Pi 2 Model B retained the familiar form factor and the 40-pin GPIO header, ensuring backward compatibility with many existing HATs (Hardware Attached on Top) and accessories. This continuity was crucial for users who had invested in the Pi ecosystem. It offered a compelling balance of performance, price, and expandability, making it an ideal platform for students learning programming, makers building robots, media centers, and even as a lightweight desktop replacement for basic tasks.
The Raspberry Pi 2 Model B was particularly well-suited for makers who needed more computational power than previous models offered but didn't require the specialized features of later boards like the Raspberry Pi 3 or 4. Its quad-core CPU and 1GB of RAM made it capable of running more resource-intensive operating systems and applications, including desktop environments, more complex simulations, and projects involving computer vision or machine learning at a basic level. It remains a capable board for many embedded applications and learning scenarios.
Watch
Related video, embedded from YouTube.
Specifications
| Microcontroller / SoC | Broadcom BCM2836 |
| Architecture | Quad-core ARM Cortex-A7 |
| Clock speed | 900 MHz |
| Flash / Storage | MicroSD card slot (up to 32GB recommended, higher may work) |
| RAM / SRAM | 1 GB LPDDR2 SDRAM |
| Operating voltage | 3.3V |
| Digital I/O pins | 26 GPIO pins (programmable) |
| Analog / ADC | — (No built-in Analog-to-Digital Converter) |
| PWM | Software PWM available on many GPIO pins |
| Connectivity | 10/100 Ethernet port, Wi-Fi (via USB dongle), Bluetooth (via USB dongle) |
| USB | 4 x USB 2.0 Type-A ports |
| Power input | Micro USB (5V, 2A recommended) |
| Dimensions | 85 mm x 56 mm |
Pinout & pin functions
| Pin | Function |
|---|---|
| 3.3V | Power output (3.3V) |
| 5V | Power output (5V) |
| 5V | Power output (5V) |
| GND | Ground |
| GND | Ground |
| GPIO 2 | I2C SDA |
| GPIO 3 | I2C SCL |
| GPIO 4 | General Purpose I/O |
| GPIO 5 | General Purpose I/O |
| GPIO 6 | General Purpose I/O |
| GPIO 7 | SPI MOSI |
| GPIO 8 | SPI MISO |
| GPIO 9 | SPI SCLK |
| GPIO 10 | SPI CS0 |
| GPIO 11 | SPI CS1 |
| GND | Ground |
| GPIO 14 | UART TXD |
| GPIO 15 | UART RXD |
| GPIO 17 | General Purpose I/O |
| GPIO 18 | General Purpose I/O (PWM0) |
| GPIO 19 | General Purpose I/O (PWM1) |
| GPIO 20 | General Purpose I/O |
| GPIO 21 | General Purpose I/O |
| GPIO 22 | General Purpose I/O |
| GPIO 23 | General Purpose I/O |
| GPIO 24 | General Purpose I/O |
| GPIO 25 | General Purpose I/O |
| GPIO 26 | General Purpose I/O |
| GPIO 27 | General Purpose I/O |
| GND | Ground |
| GPIO 28 | General Purpose I/O |
| GPIO 29 | General Purpose I/O |
| GPIO 30 | General Purpose I/O |
| GPIO 31 | General Purpose I/O |
| GPIO 32 | General Purpose I/O |
| GPIO 33 | General Purpose I/O |
| GND | Ground |
| 5V | Power output (5V) |
| RUN | Reset pin (active low) |
Wiring & circuit basics
Powering the Raspberry Pi 2 Model B requires a stable 5V supply. The recommended power source is a Micro USB cable connected to a power adapter capable of delivering at least 2 Amperes. Using a lower-amperage adapter or a long, thin USB cable can lead to undervoltage issues, causing instability and unexpected reboots. The board has onboard voltage regulators to step down the 5V supply to the 3.3V required by the SoC and peripherals. Avoid powering the board through the GPIO pins unless you have a very specific, low-power setup and understand the implications.
All GPIO pins on the Raspberry Pi 2 Model B operate at a logic level of 3.3V. This is crucial when interfacing with external components. Connecting a 5V device directly to a GPIO pin can permanently damage the Raspberry Pi. If you need to interface with 5V logic devices (like many common Arduino shields or sensors), you must use a logic level shifter. Conversely, most 3.3V devices can be safely connected to the Pi's GPIO pins.
For a simple LED project, connect an LED's anode (longer leg) to a GPIO pin (e.g., GPIO 17) through a current-limiting resistor (typically 220-330 Ohms). Connect the LED's cathode (shorter leg) to a Ground (GND) pin. When you set GPIO 17 to HIGH in your code, current flows from the 3.3V supply, through the resistor and LED, to ground, illuminating the LED. For an I2C sensor, connect its VCC to a 3.3V pin, its GND to a GND pin, its SDA line to GPIO 2, and its SCL line to GPIO 3.
Programming & getting started
The Raspberry Pi 2 Model B primarily runs Linux-based operating systems, most commonly Raspberry Pi OS (formerly Raspbian). This means you can program it using a wide variety of languages and tools. For Python development, the pre-installed Python interpreter on Raspberry Pi OS is excellent. You can write scripts in a text editor or use an IDE like Thonny (often included) or VS Code. For more complex embedded projects or when you need lower-level control, you can use C/C++ with the GCC compiler. Tools like `wiringPi` (though now deprecated, it was historically significant) or the `RPi.GPIO` Python library provide easy access to GPIO pins.
To upload your first program (e.g., a Python script to blink an LED), you would typically write the script on the Raspberry Pi itself using its desktop environment or via SSH. Save the script (e.g., `blink.py`). To run it, open a terminal, navigate to the directory where you saved the file, and execute it using `python3 blink.py`. For C/C++ programs, you would compile them using `gcc` on the Pi, and then run the resulting executable. For more advanced users, PlatformIO or cross-compilation toolchains can be set up on a separate development machine.